How to proxy WebSockets through AWS Cloudfront
This is a quick post on how to configure AWS Cloudfront as a reverse proxy for WebSockets. Lately, it became a good practice to proxy various services, like analytics, to our own subdomains to avoid add blockers or restrictions on our enterprise customers’s networks.
If you’re running a SaaS and integrate with various providers, you might want to proxy some of these services to your own domain.
In this example, we’ll proxy Ably through AWS Cloudfront, to our own subdomain to bypass the restrictions on one of our enterprise customer’s network.
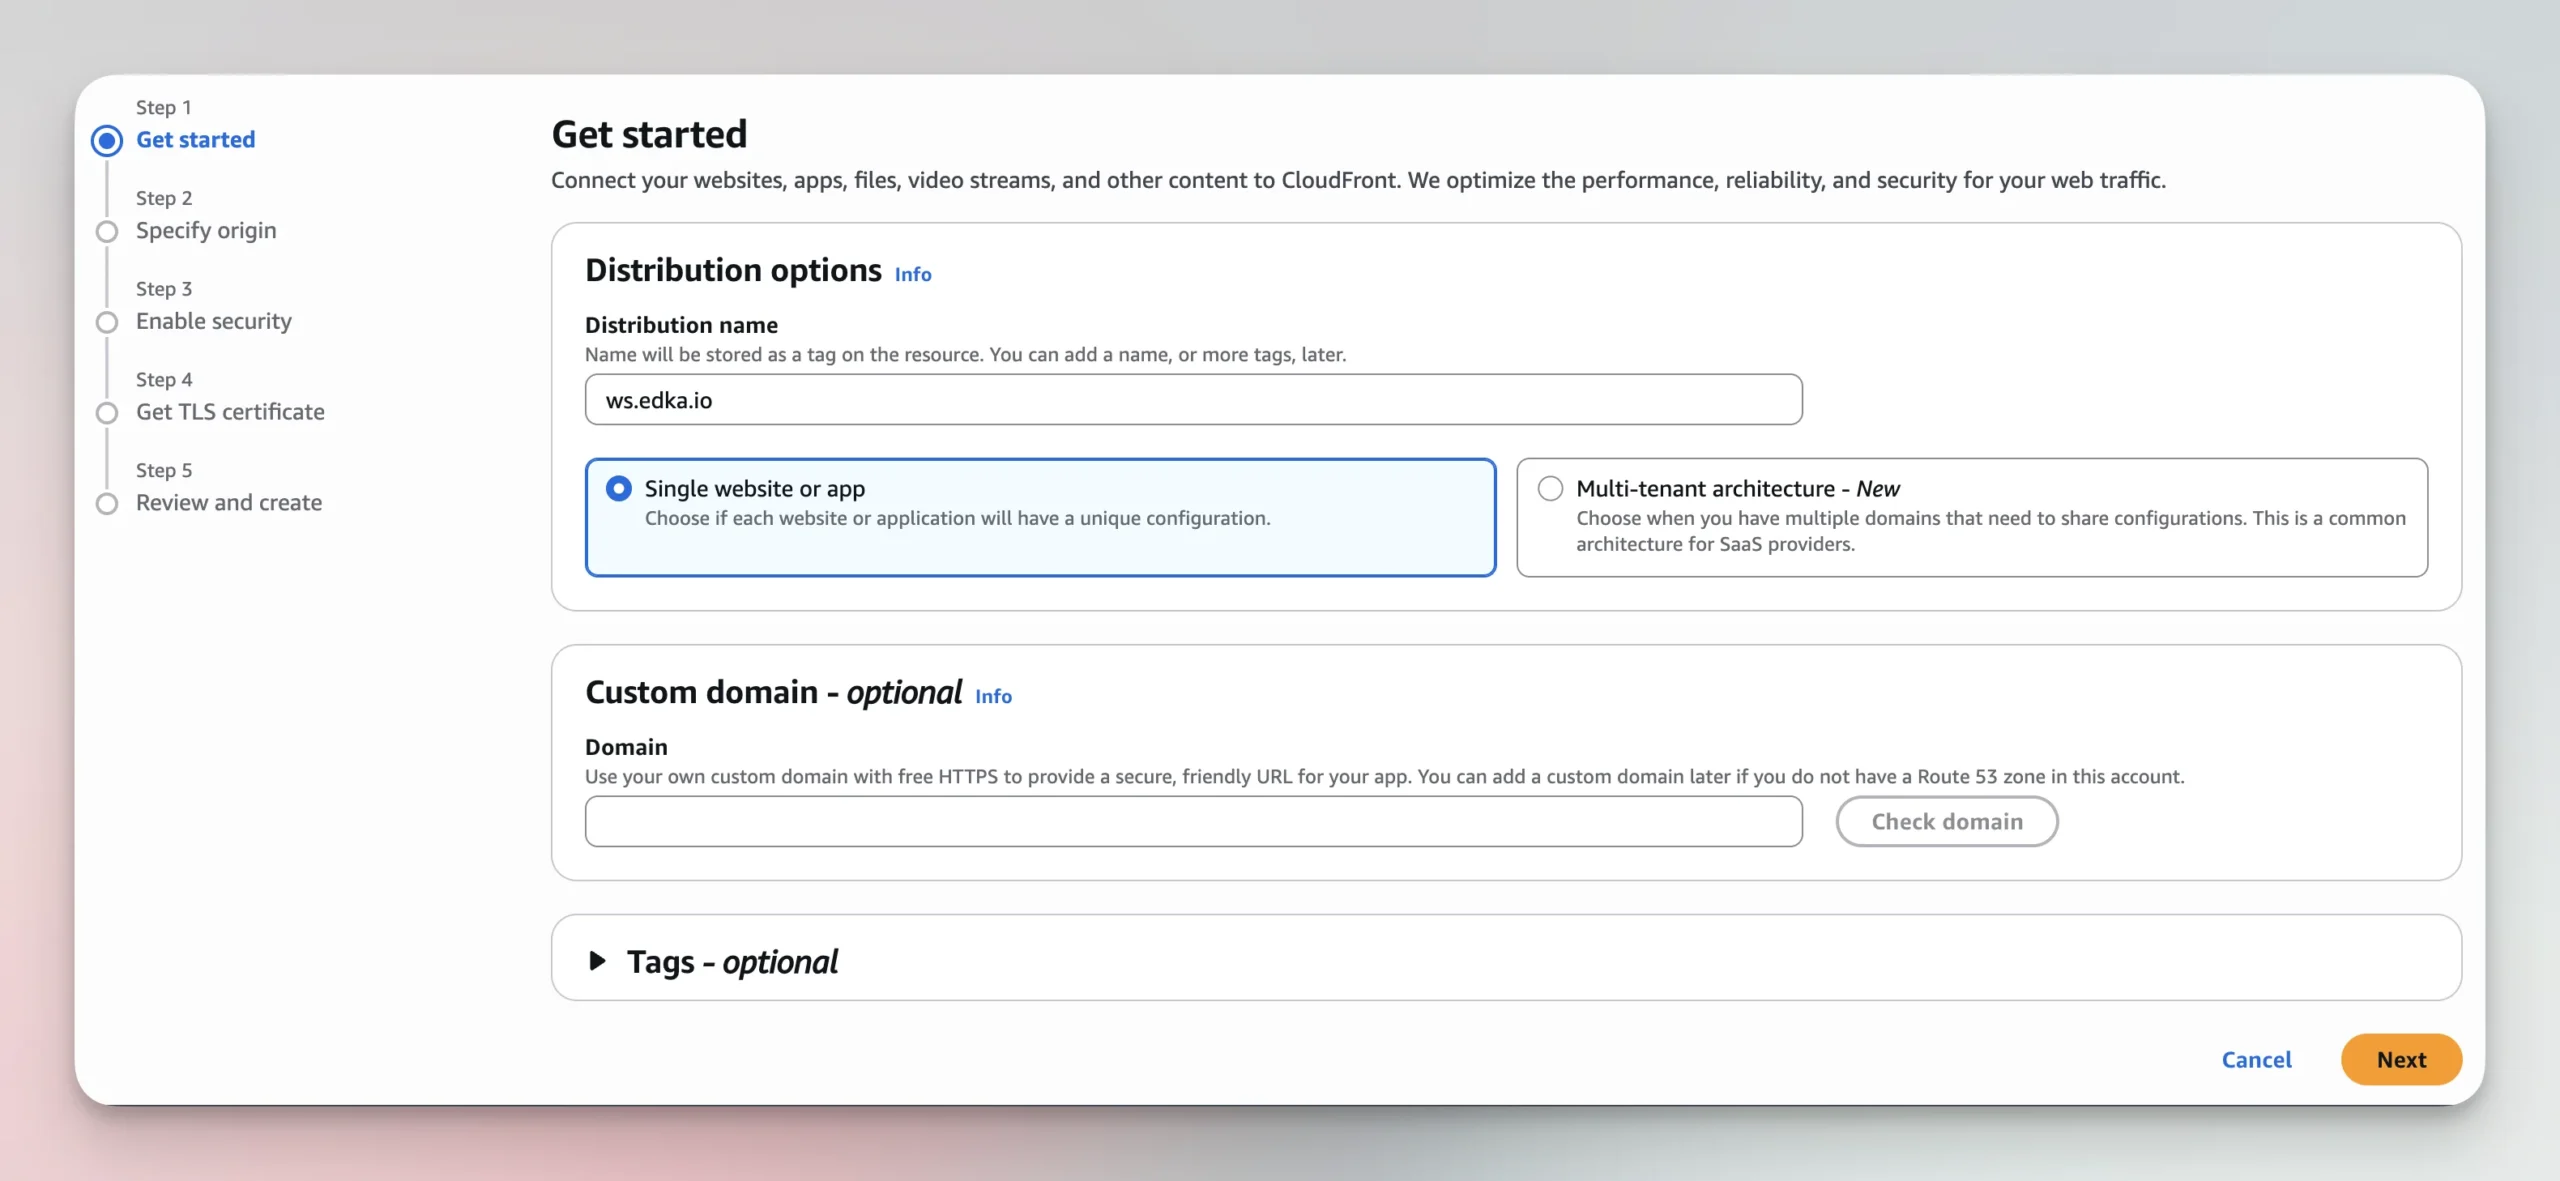
Create a new Cloudfront distribution
Set the distribution name
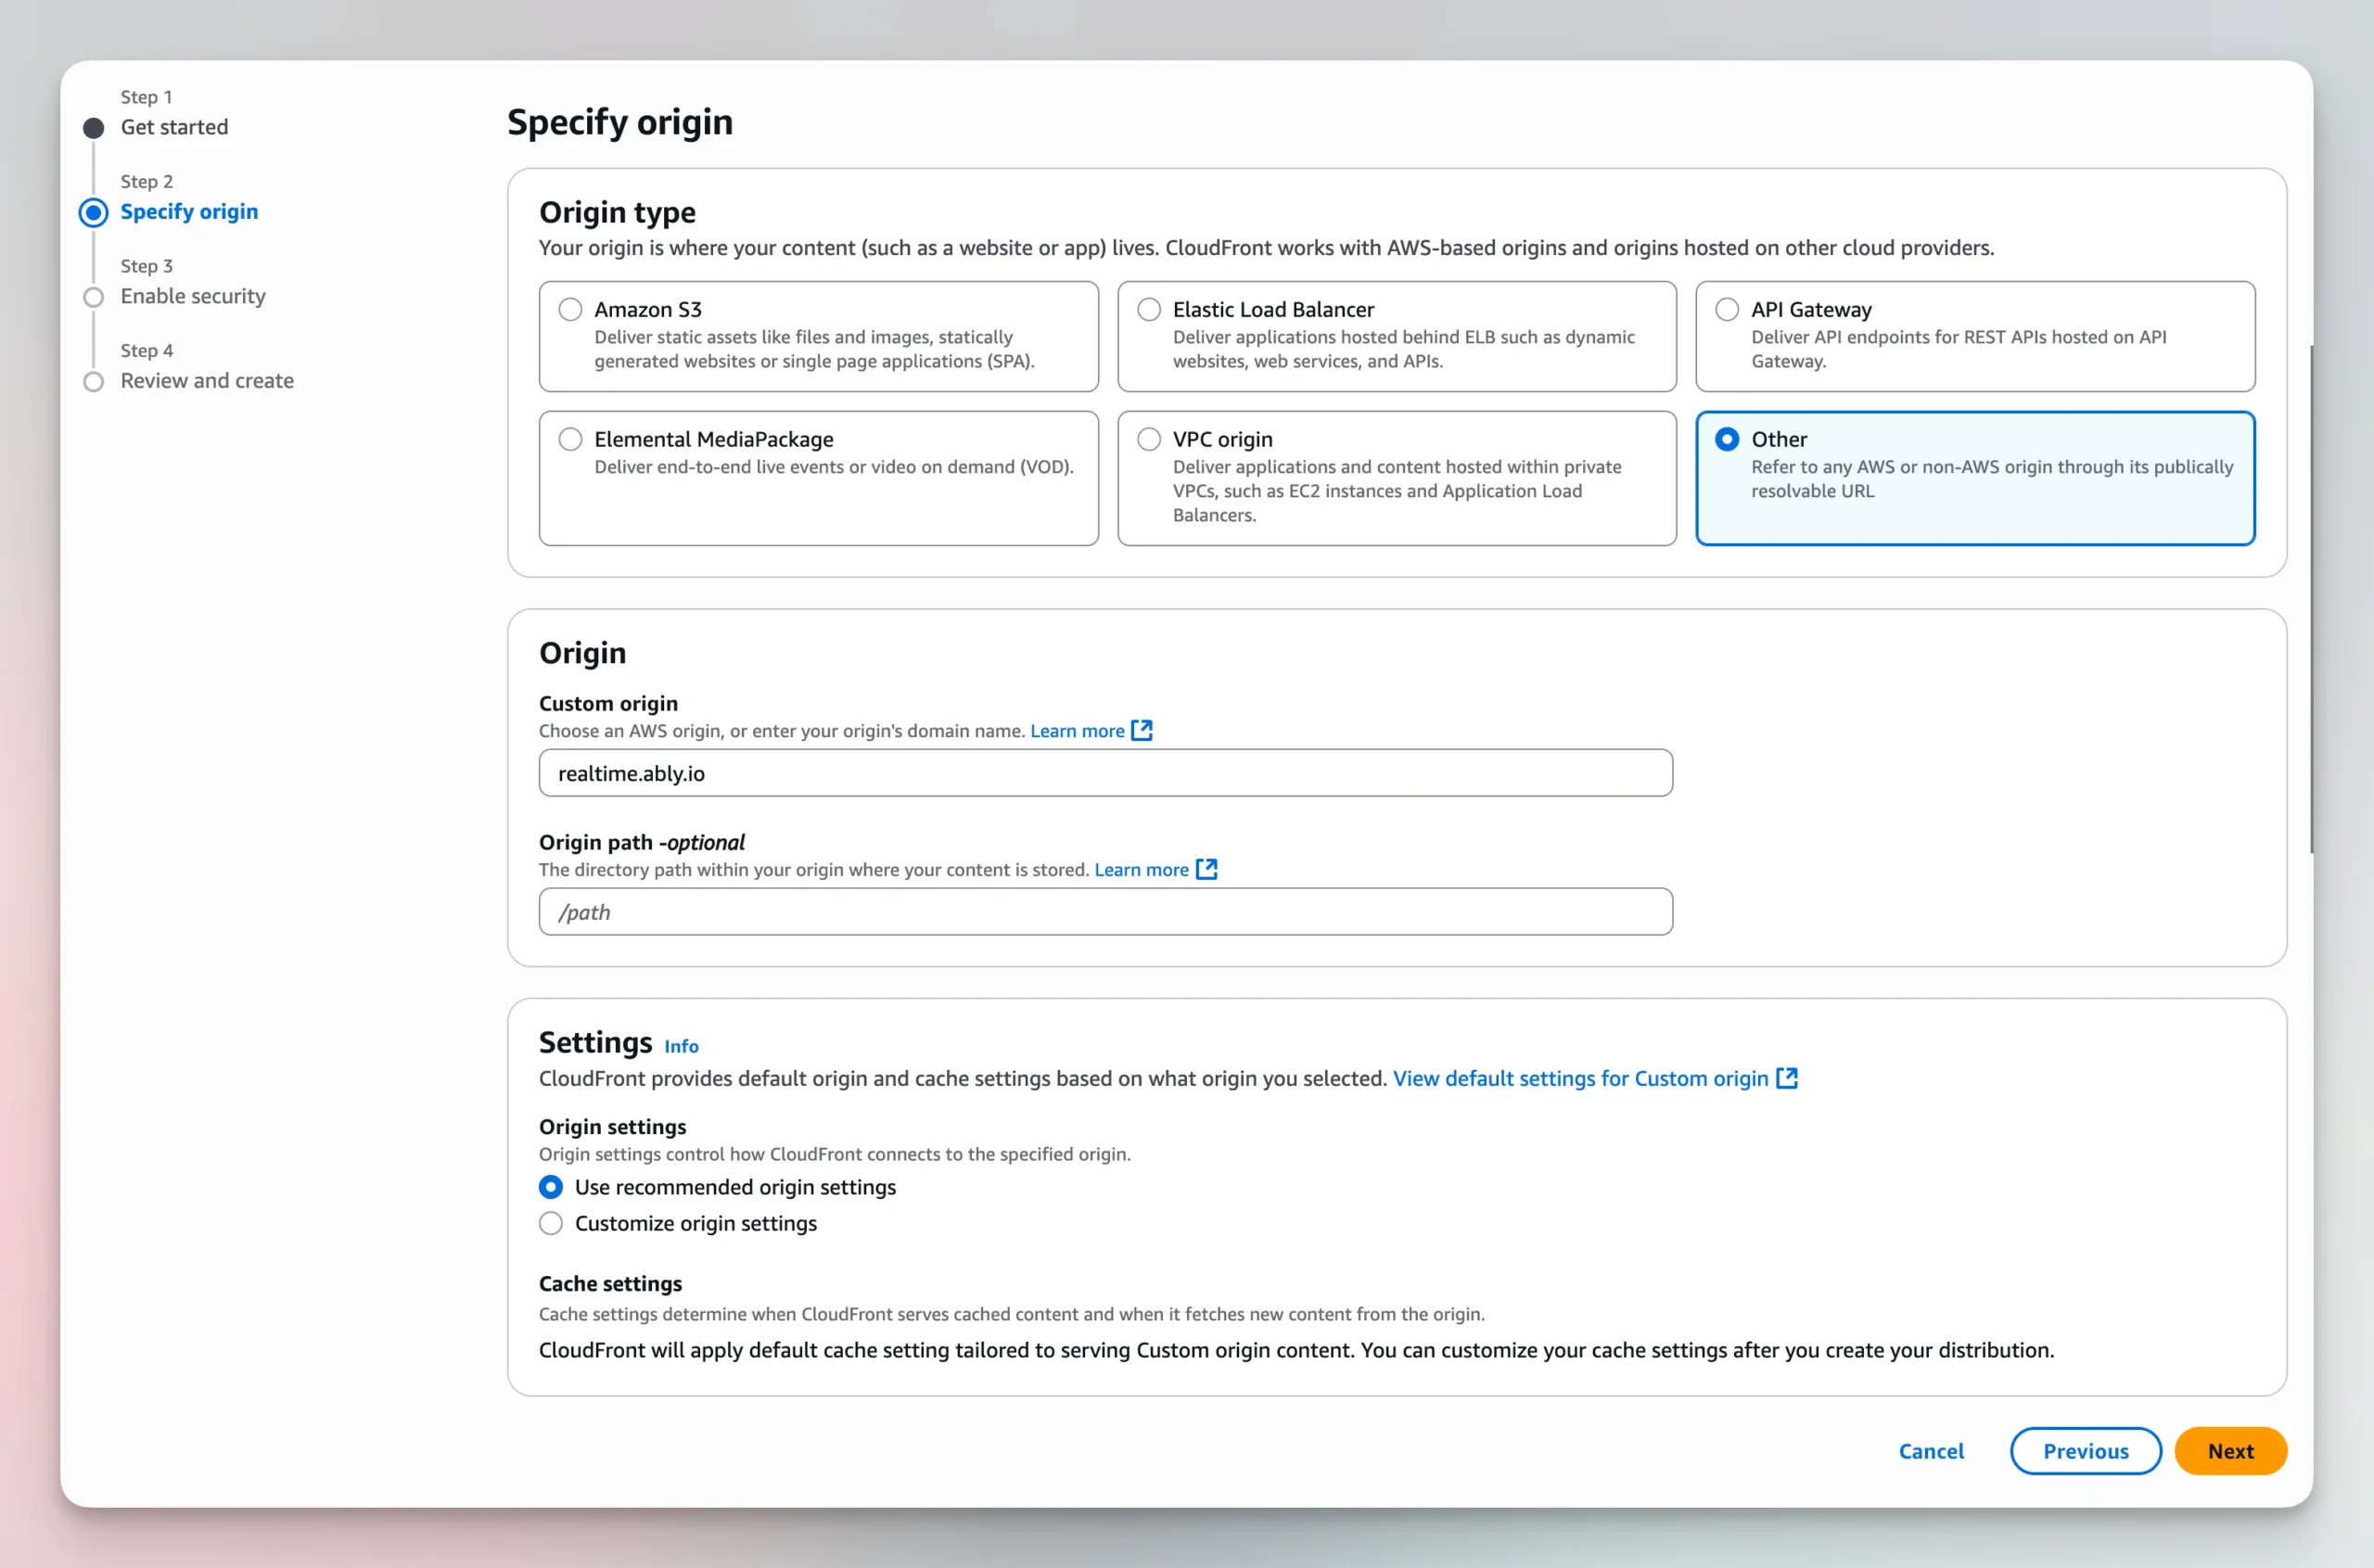
Set “Origin type” to “Other” and configure your desired origin. In this example is realtime.ably.io
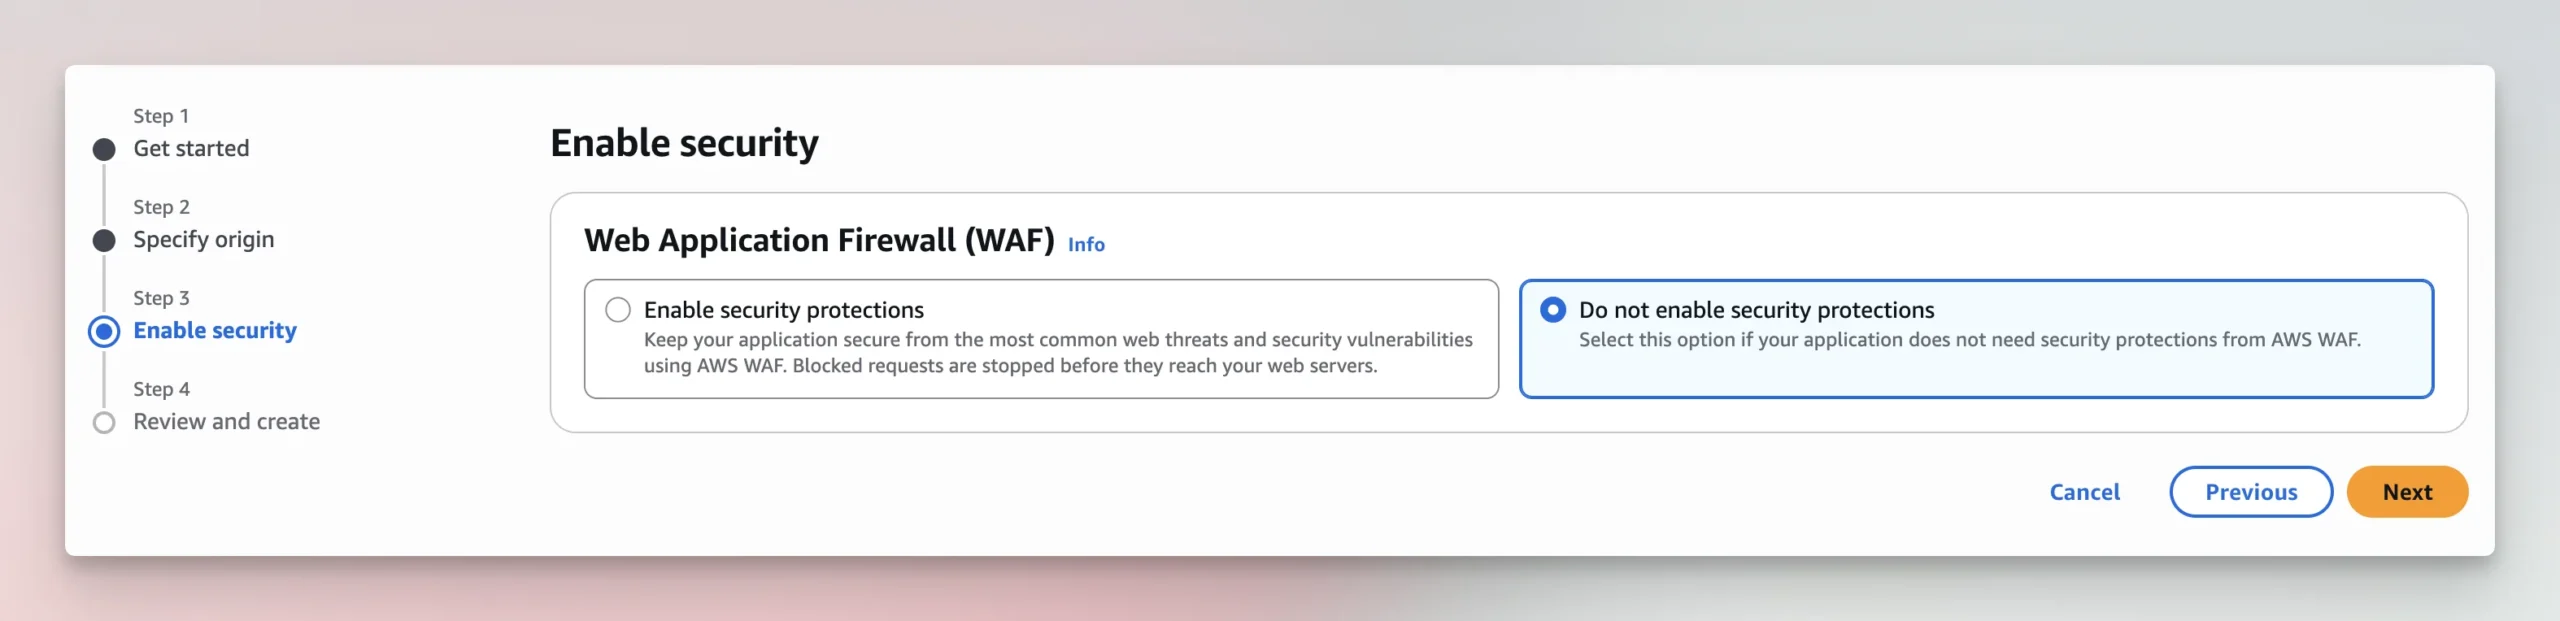
Do not enable security features
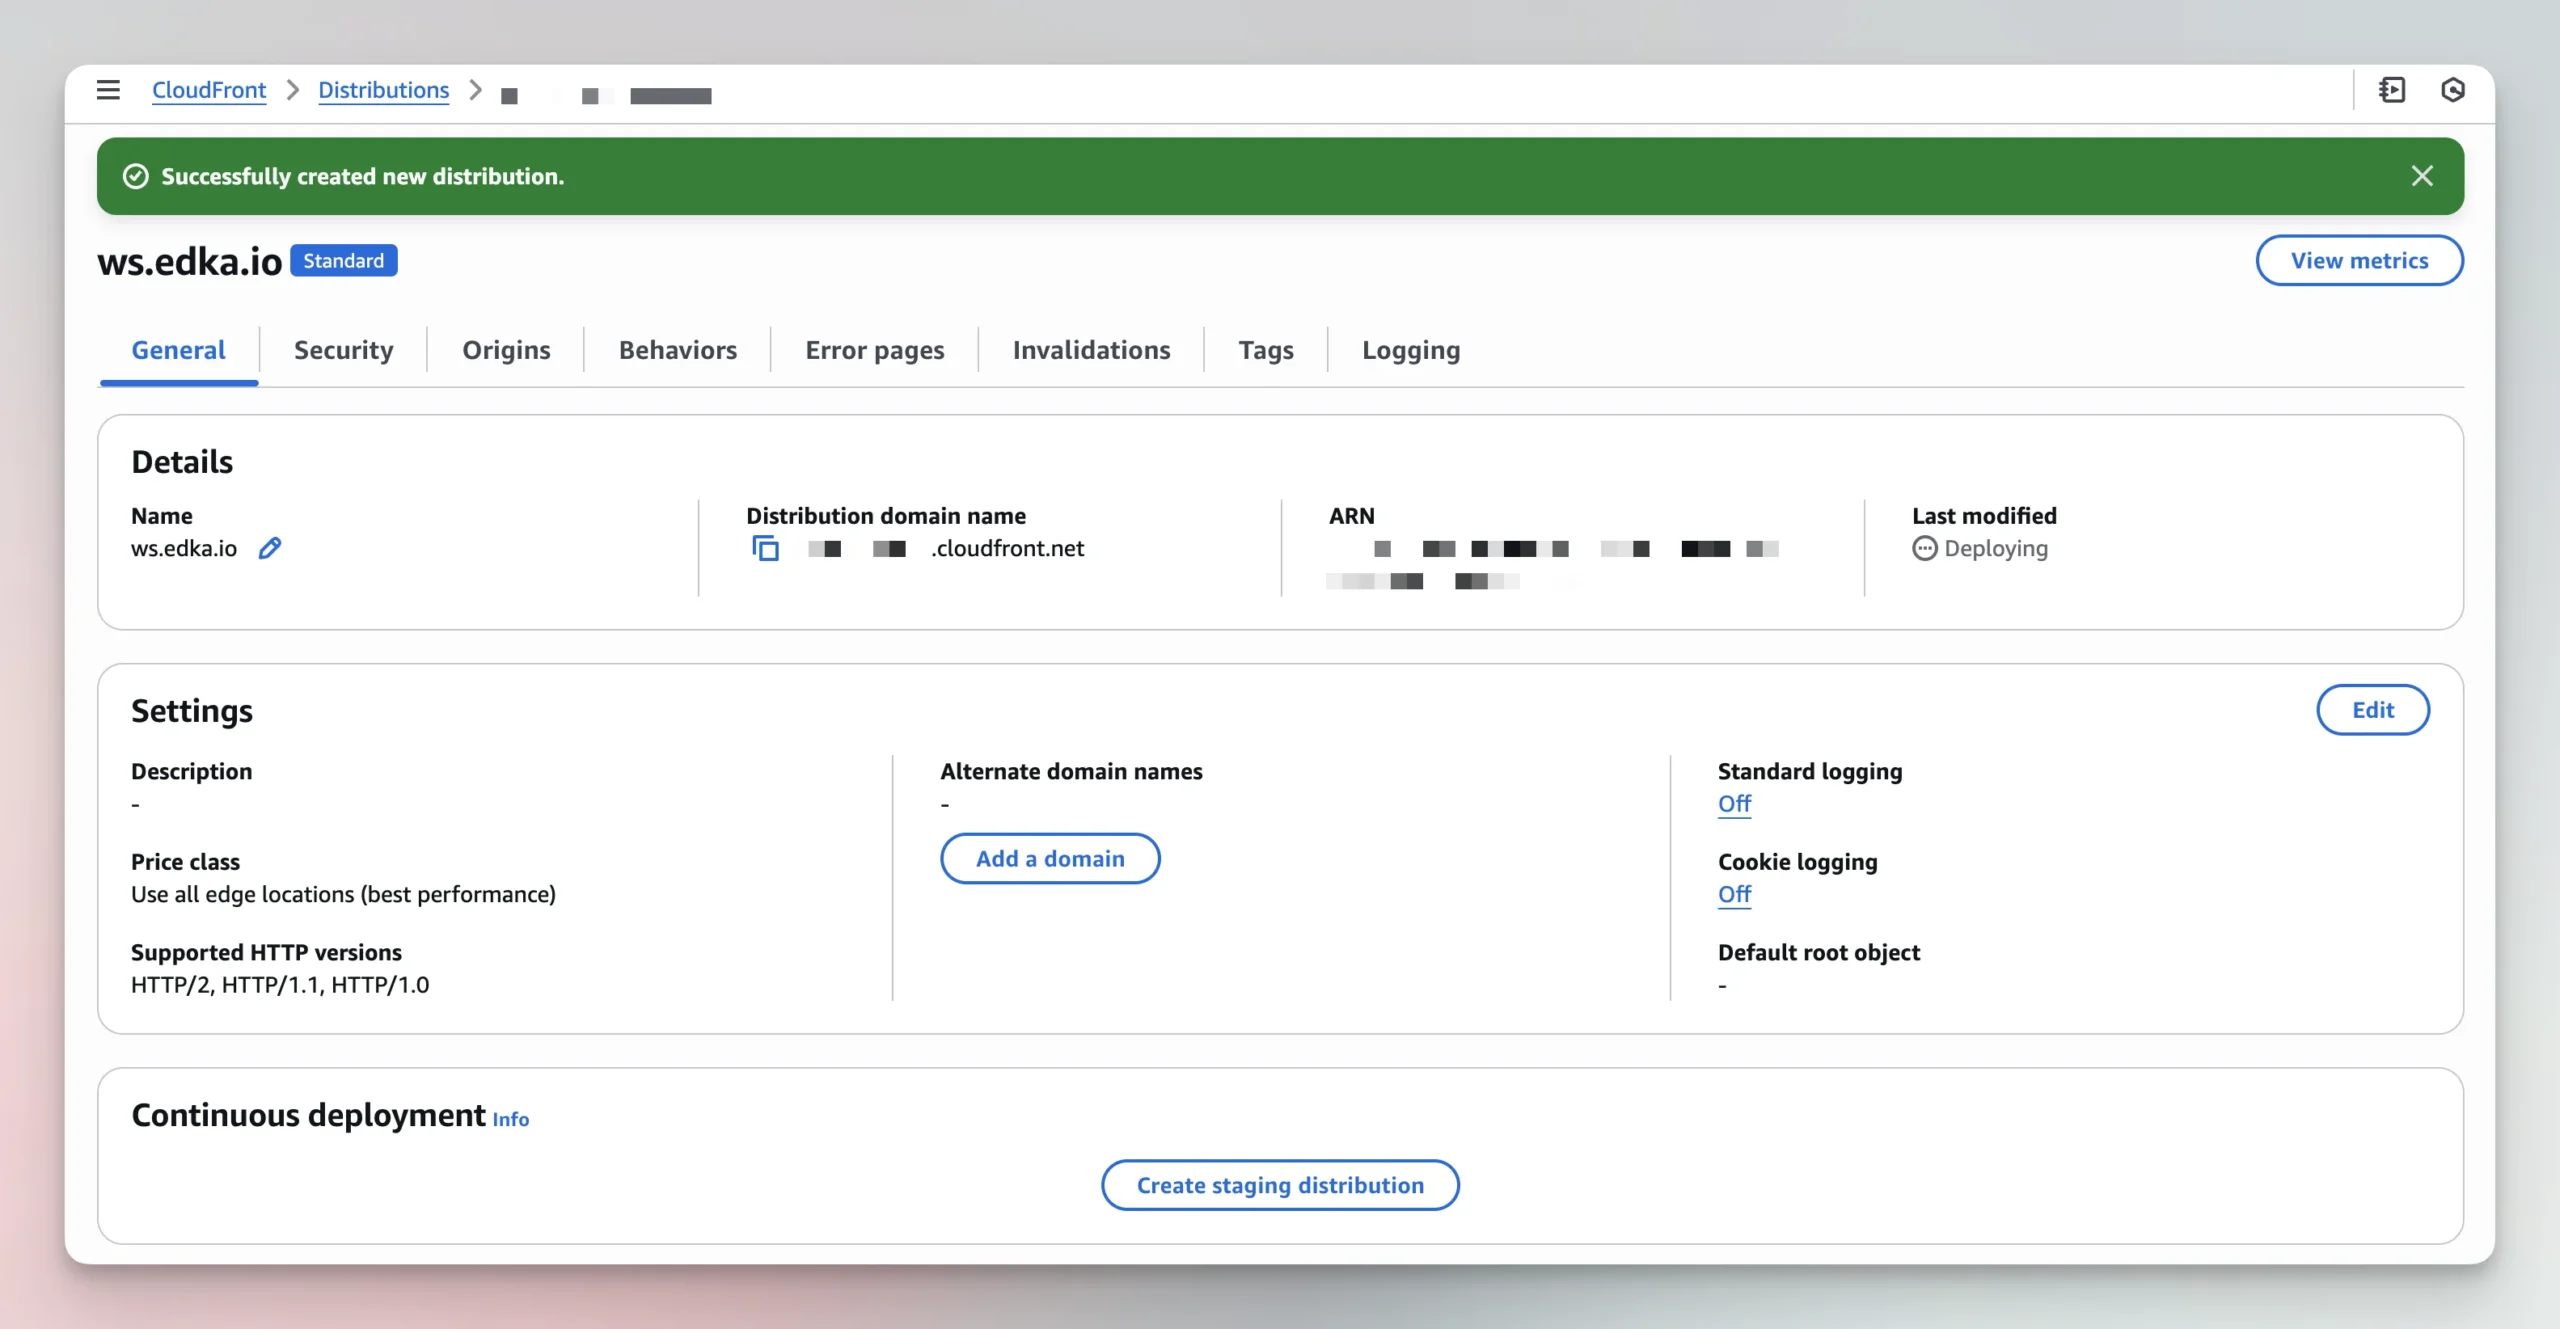
Deploy
Configure distribution
Set an “Alternate domain name (CNAME)” to your own subdomain. In this example is ws.edka.io and make sure you have a valid SSL certificate available for it. Enable both HTTP/2 and HTTP/3 and save the configuration.
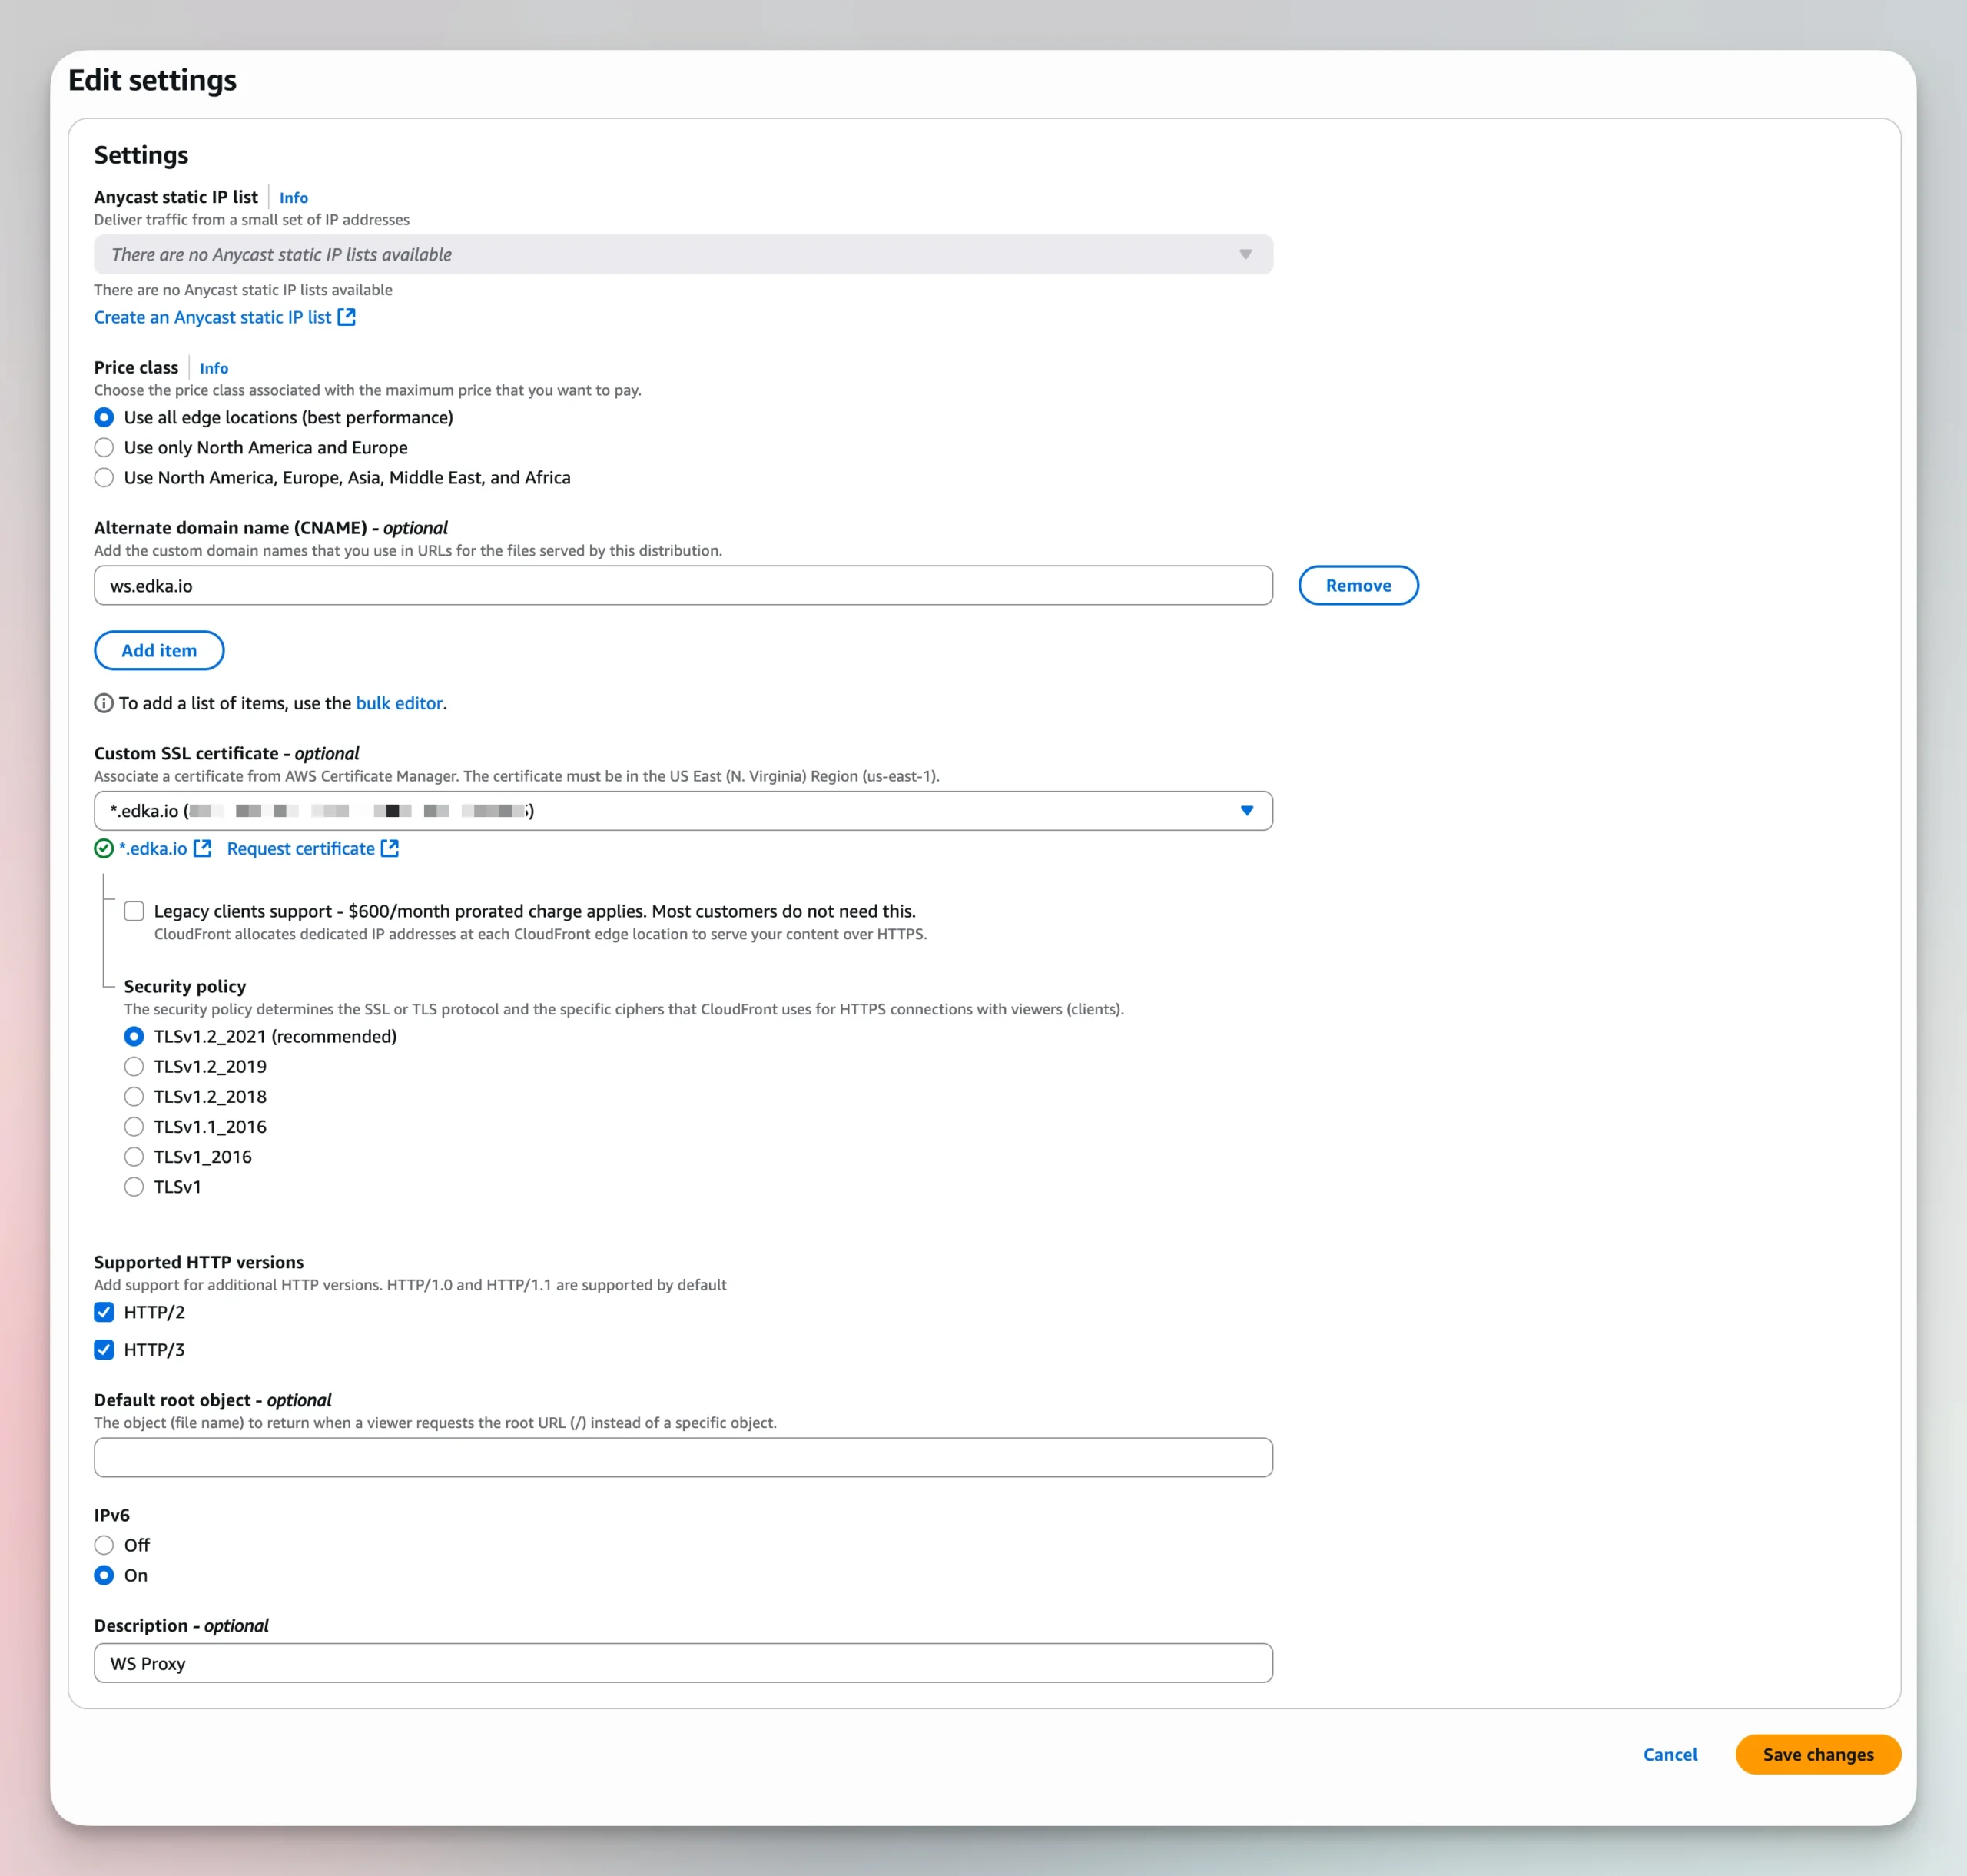
Edit the default behavior
- Disable object compression
- Set the preferred protocol. In this example we restrict ti to HTTPS only.
- Disable the “Cache policy”
- Set “Origin request policy” to
AllViewerExceptHostHeader - Set “Response headers policy” to
CORS-with-preflight-and-SecurityHeaderPolicy

Save changes and test
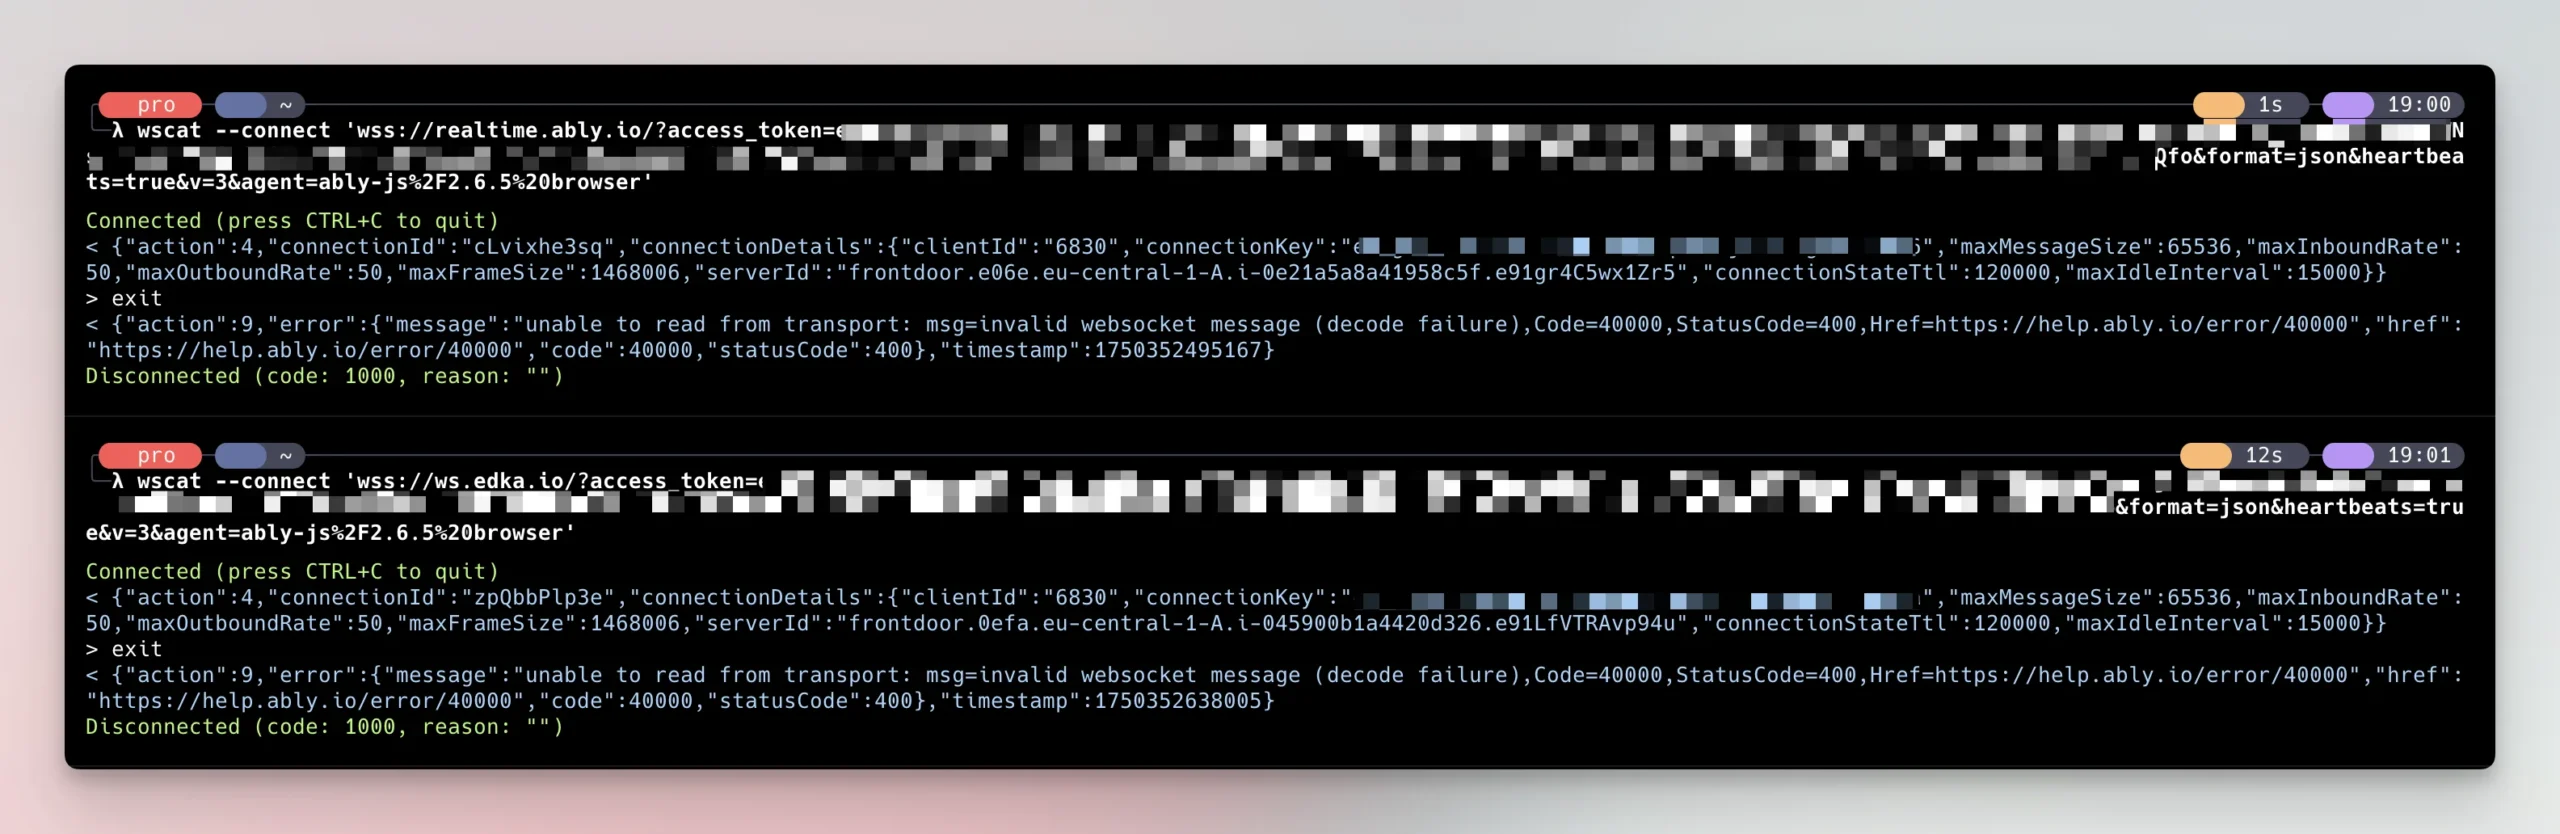
Well use wscat to test the connection.wscat --connect 'wss://realtime.ably.io/?access_token=YOUR_TOKEN&format=json&heartbeats=true&v=3&agent=ably-js%2F2.6.5%20browser'
Now, let’s replace realtime.ably.io with our own proxy.
wscat --connect 'wss://ws.edka.io/?access_token=YOUR_TOKEN&format=json&heartbeats=true&v=3&agent=ably-js%2F2.6.5%20browser'
As you can see in the screenshot, the connection is successful.
Done.
You can read more about Cloudfront WebSockets configuration on the AWS Developer Documentation page.


